
Find out a little more about this project HERE
Stage 3 of this project is 'Pre Viz' - I wanted to carry out a little bit more of an in depth pre-viz stage for this project. It's easy to rush this stage, get over excited and crack on with what you think the final scene should be. But spending a little longer in the pre visualization of the scene should enable you to make decisions about the final look and feel of the scene allot quicker, it will also help you work out what definitely won't work which is a big help in preventing time wasting further along the process.
I carried out a few stage to this process as detailed below:
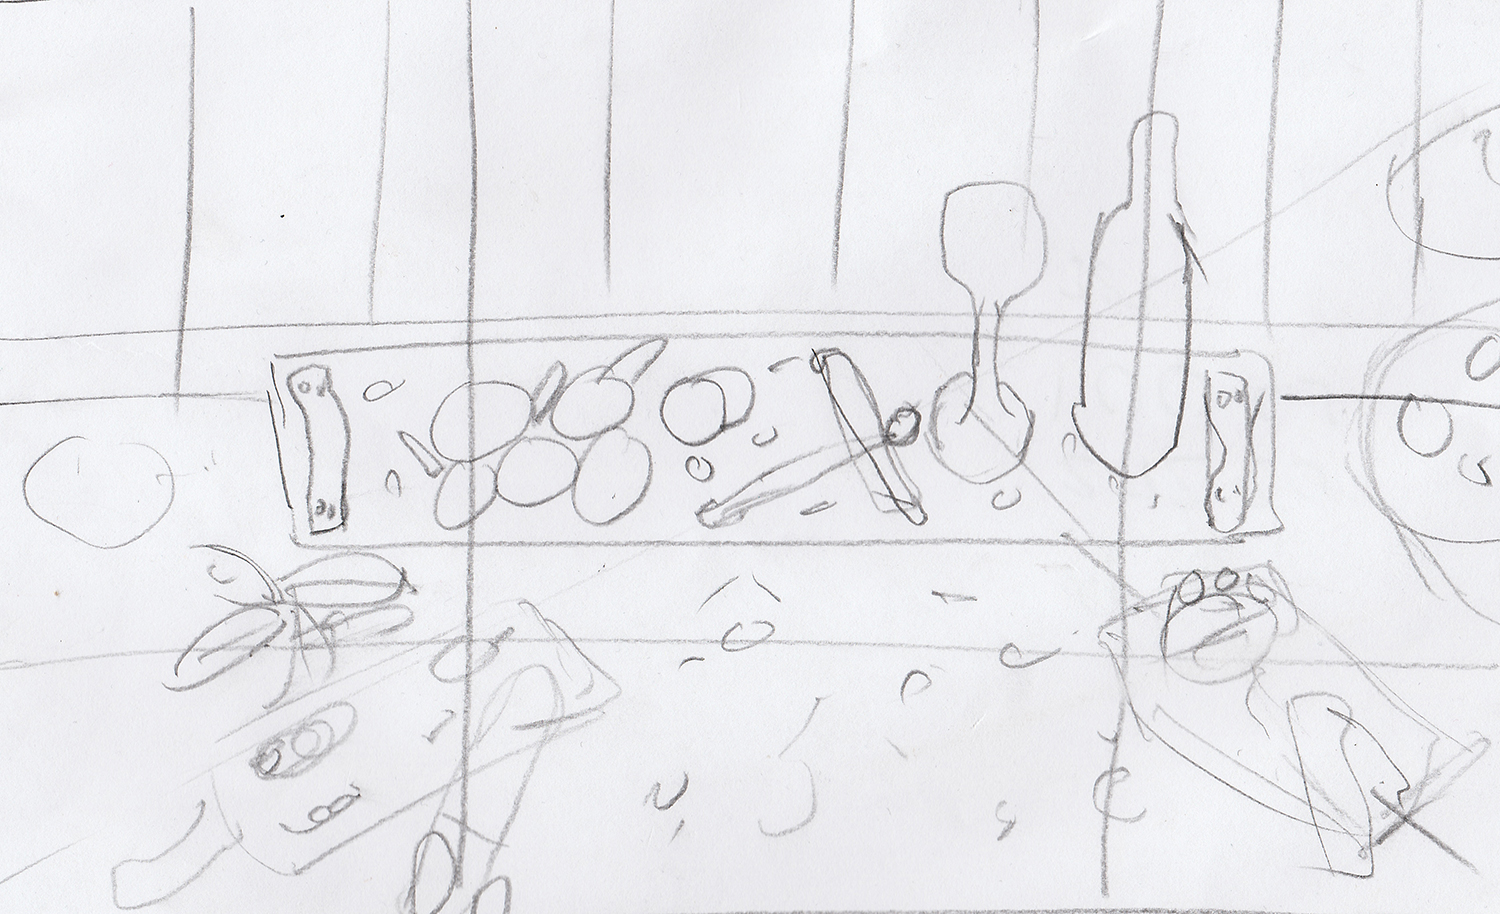
01: INITIAL SKETCHES
Based on my research had a good idea of the various elements I wanted to include in the scene so I was able to quickly sketch out an idea of what I wanted, as you can see below there are allot of elements and they are all spread out. This may be great for a more general still life image but I felt I needed to condense the composition on the images to help keep focus on the main subject of the image which is the Gin bottle itself.
At this stage I went on and just listed all of the elements I thought I wanted in the scene:
1 - GROUND PLANE
2 - CHOPPING BOARD
3 - PLATE
4 - BOTTLE
5 - DRINK/GLASS
6 - LEMONS/MICROPLANE
7 - COCKTAIL SPOON
8 - CAKE/FORK}
9 - BOWLS OF BOTANICALS
12 - GREEN LEAFS
10 - VANILLA PODS
11 - SCATTERING OBJECTS
12 - HIGH FREQUENCY TEXTURES

02: SHOT PLANNING
Carrying on from my initial sketches I worked on condensing the the composition of the images, I then quickly defined some camera angles and ket shots I wanted to produce.
As you can see below these are really rough but they gave me a clear foundation to base my mock-ups on.
I have indicated wooden planks as the floor plane for the scene, these are a compositional element that I hope will help lead the eye into the image and to the main subject the Gin bottle.

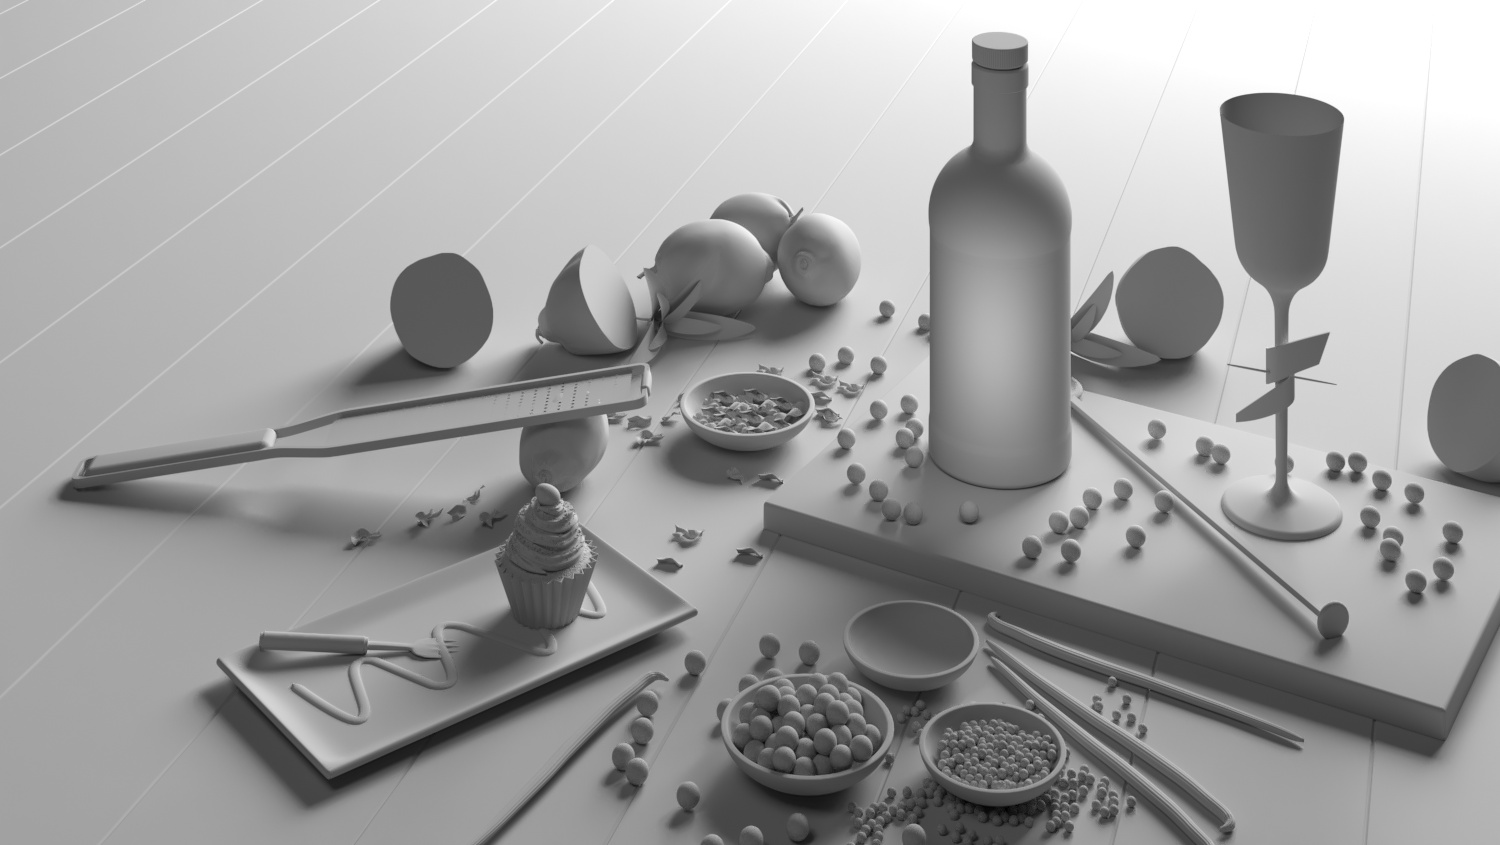
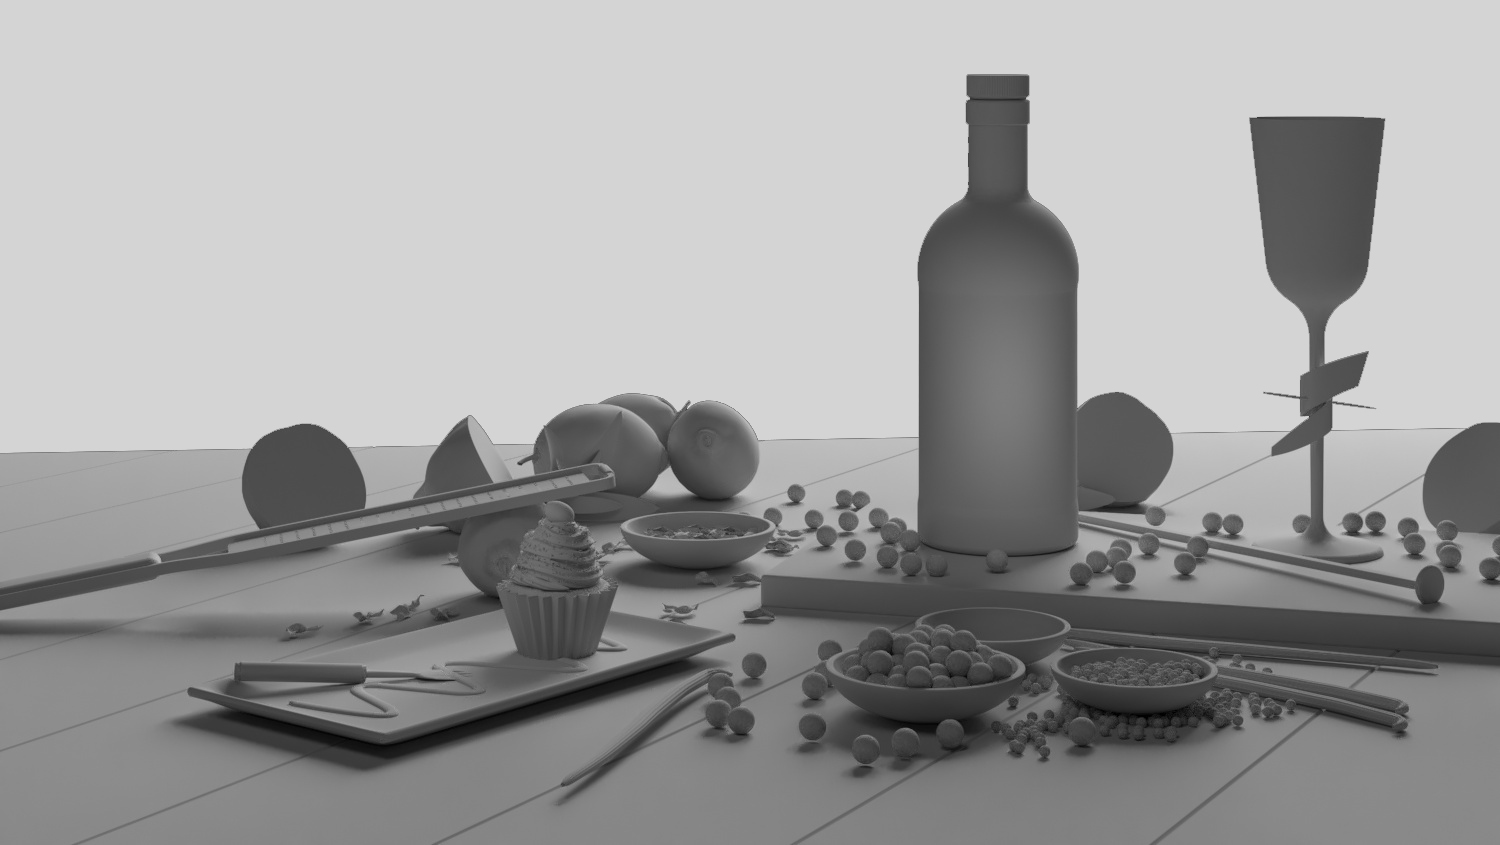
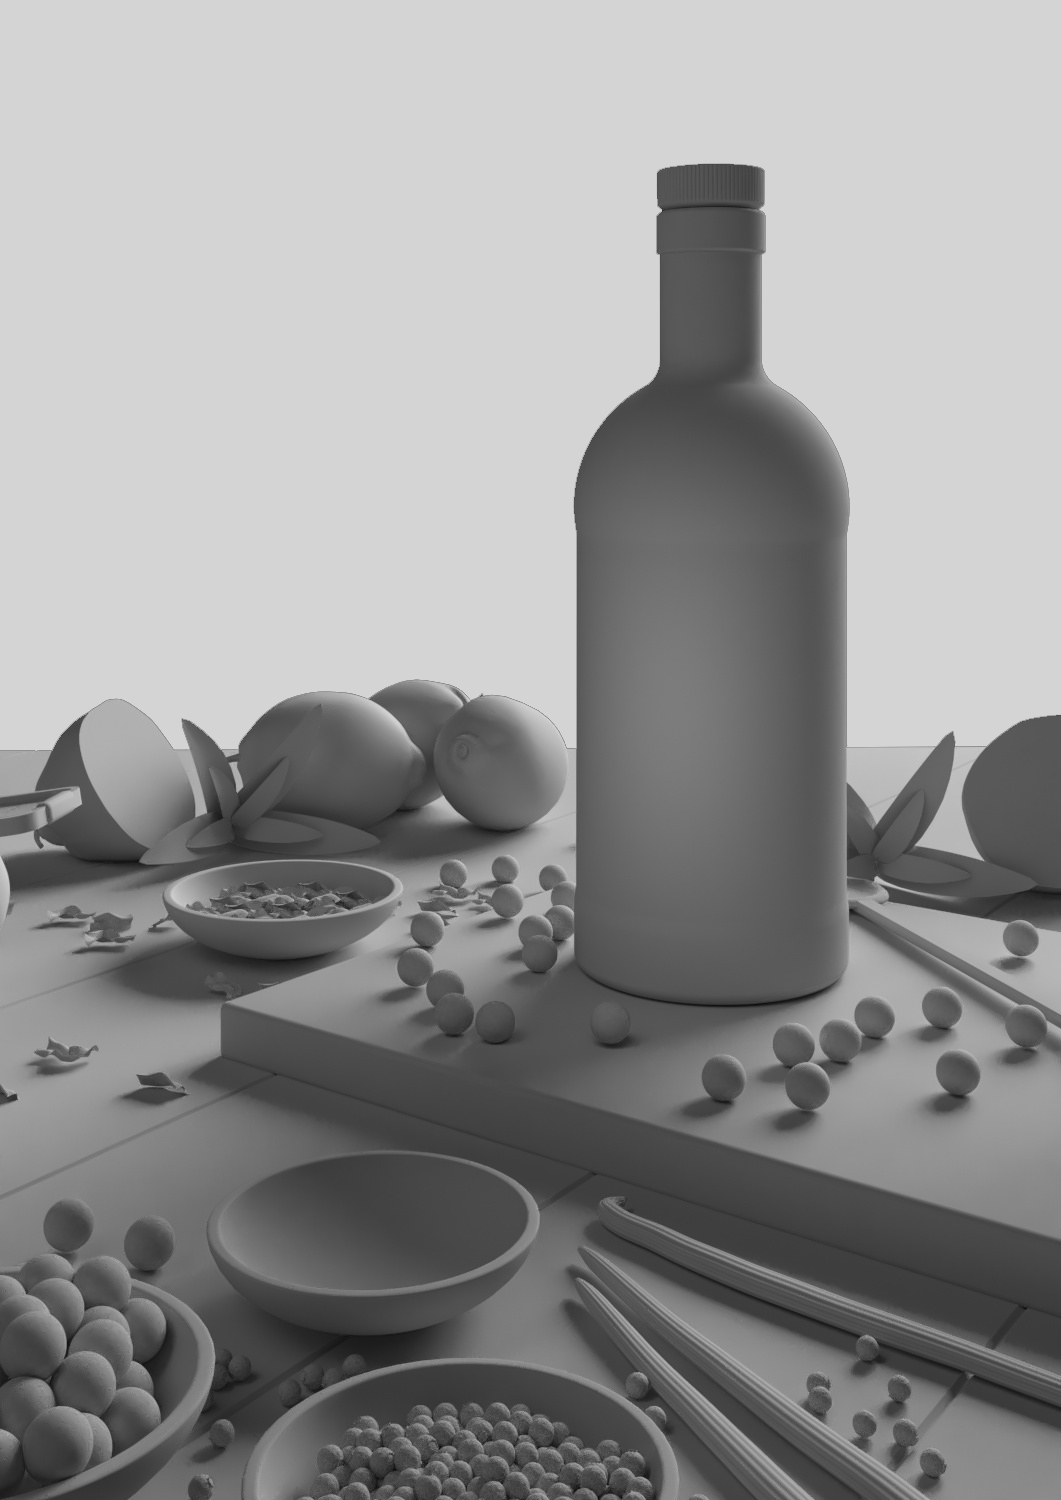
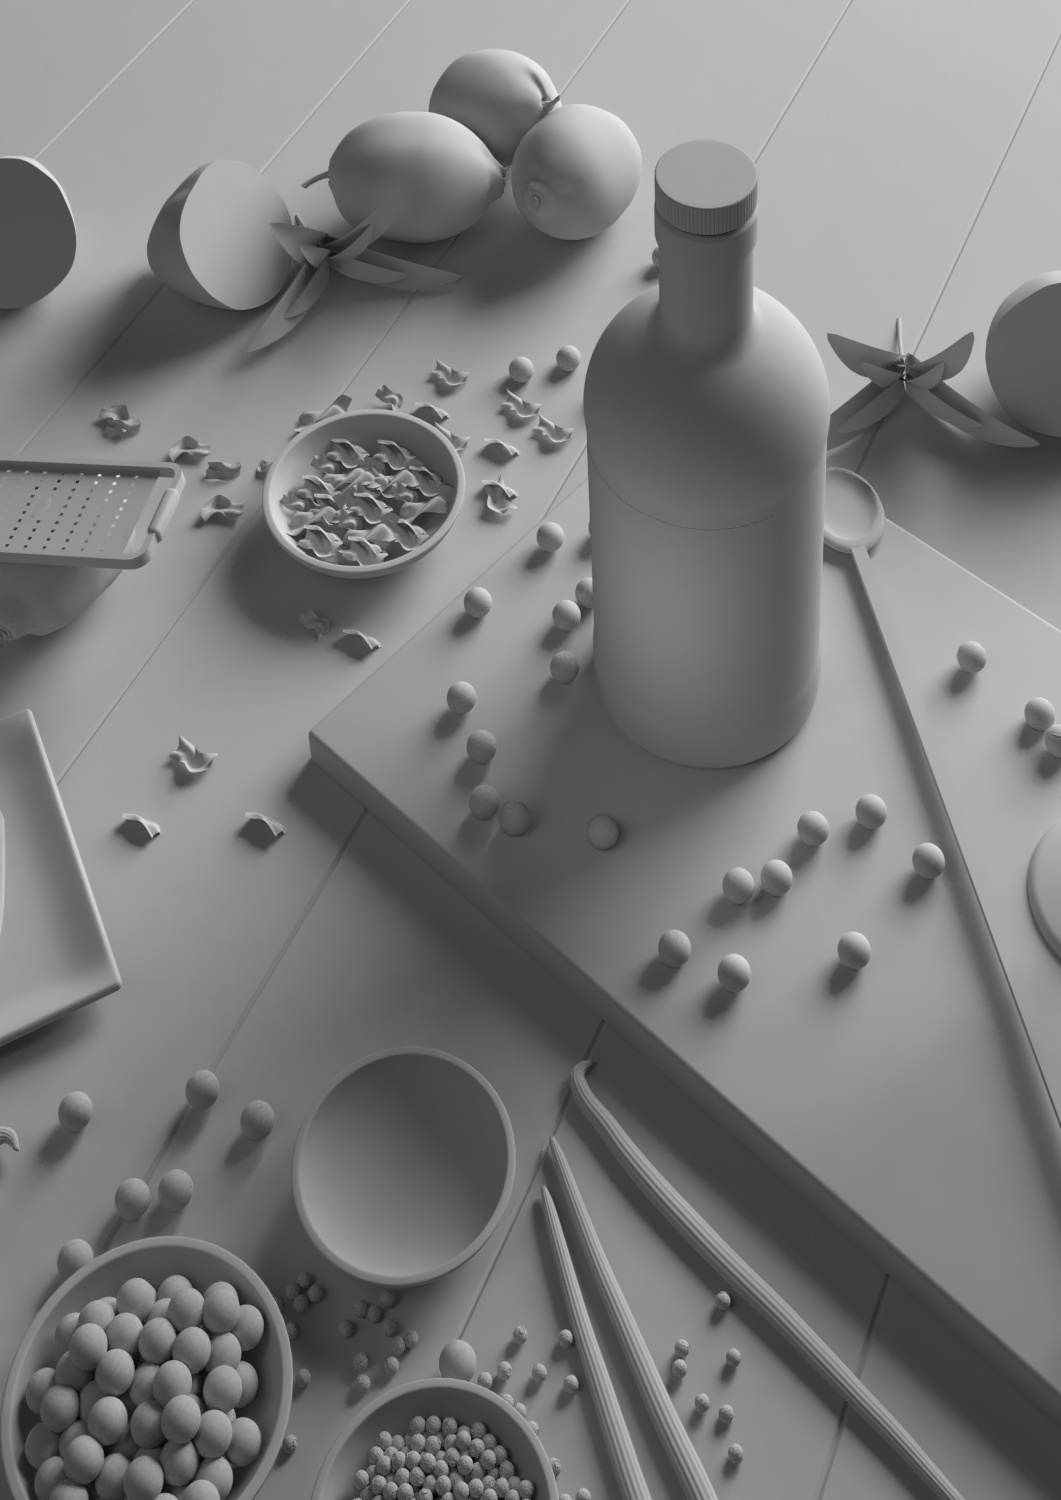
03: SHOT MOCK UP
I ended up with the following shot ideas:
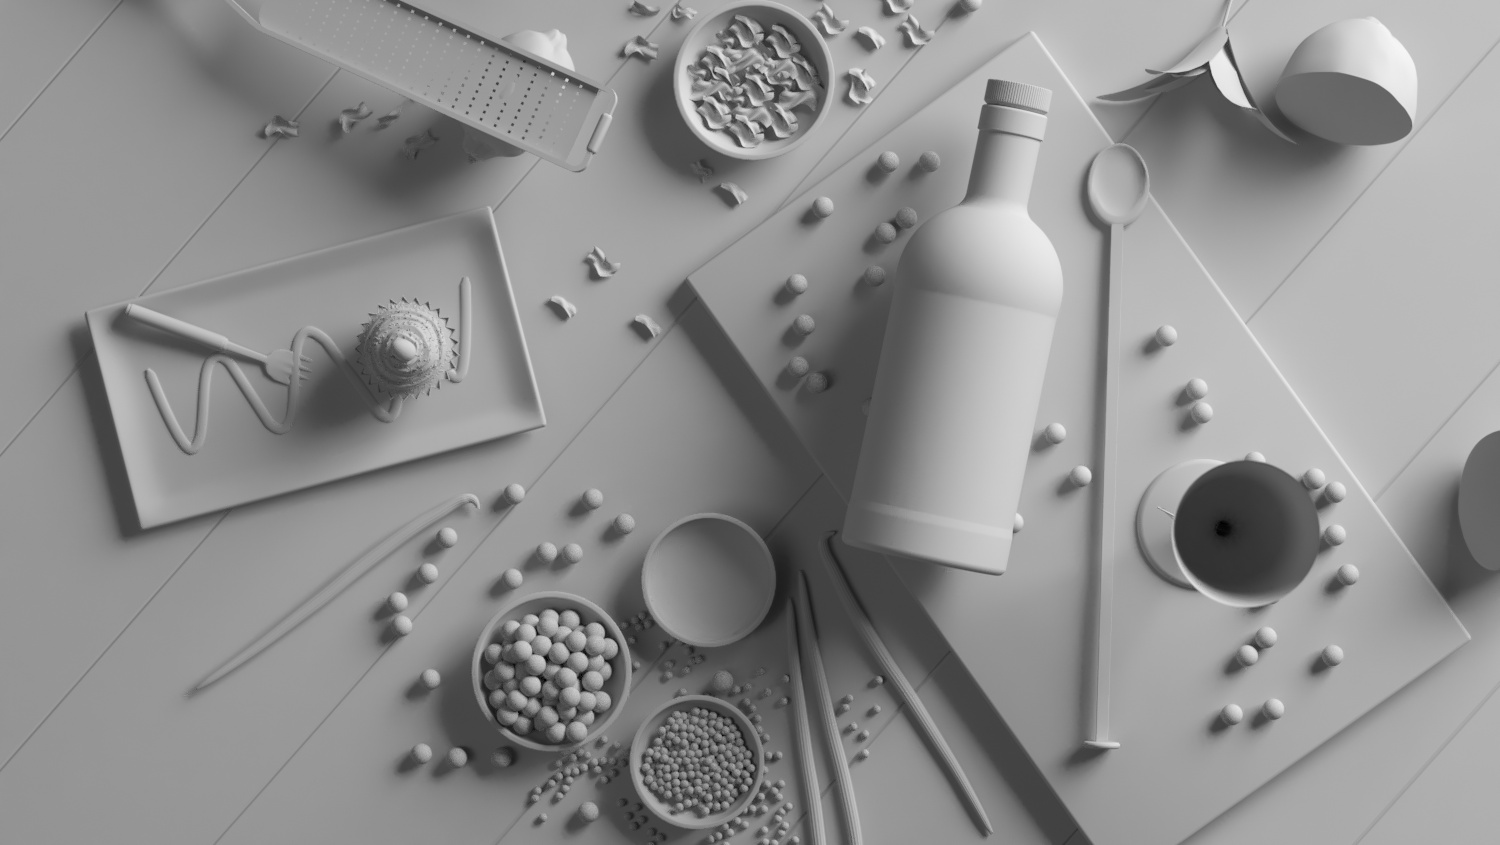
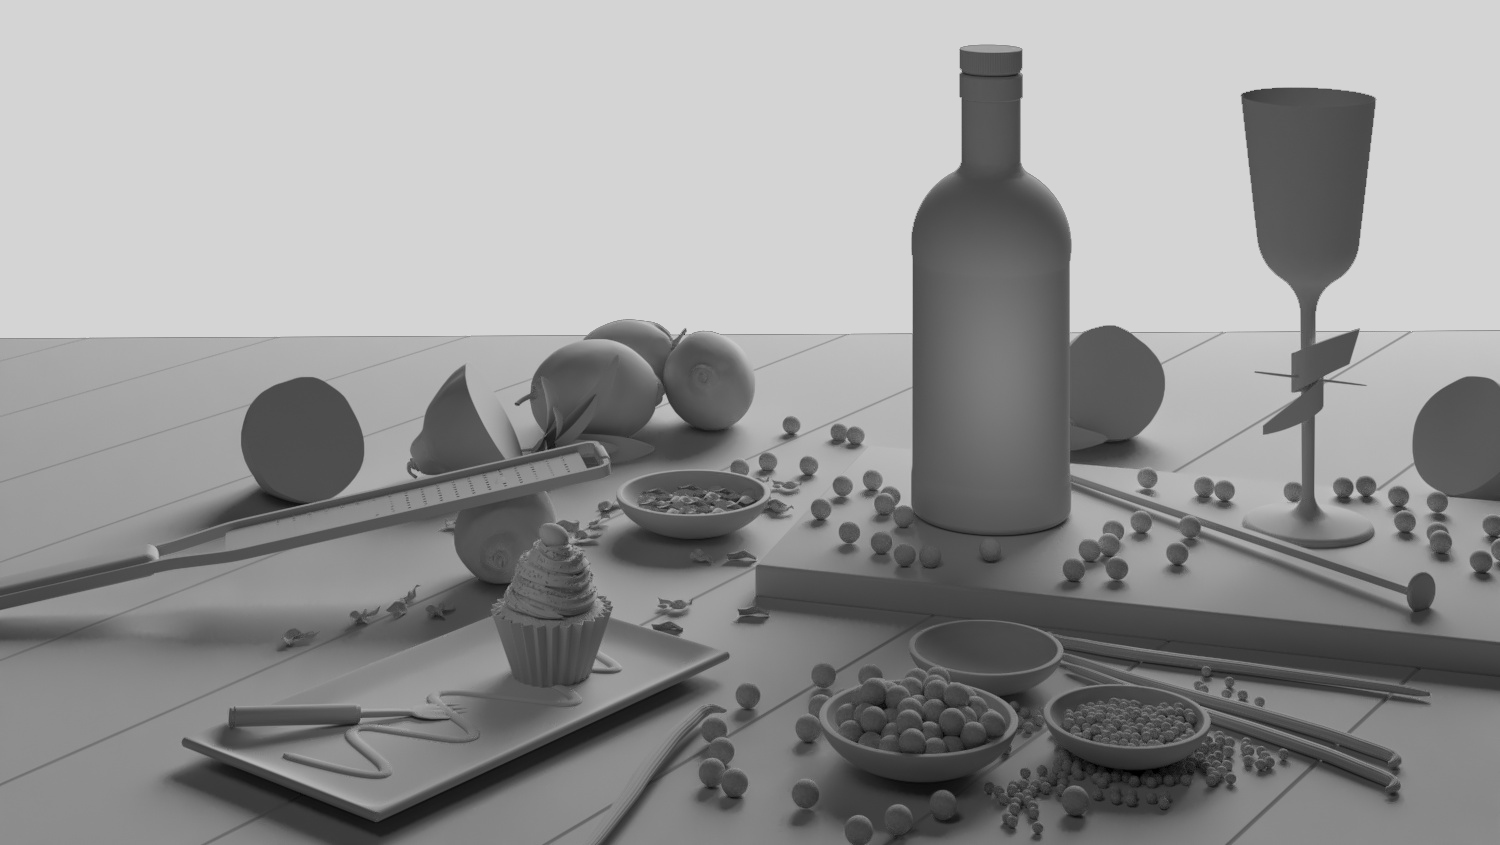
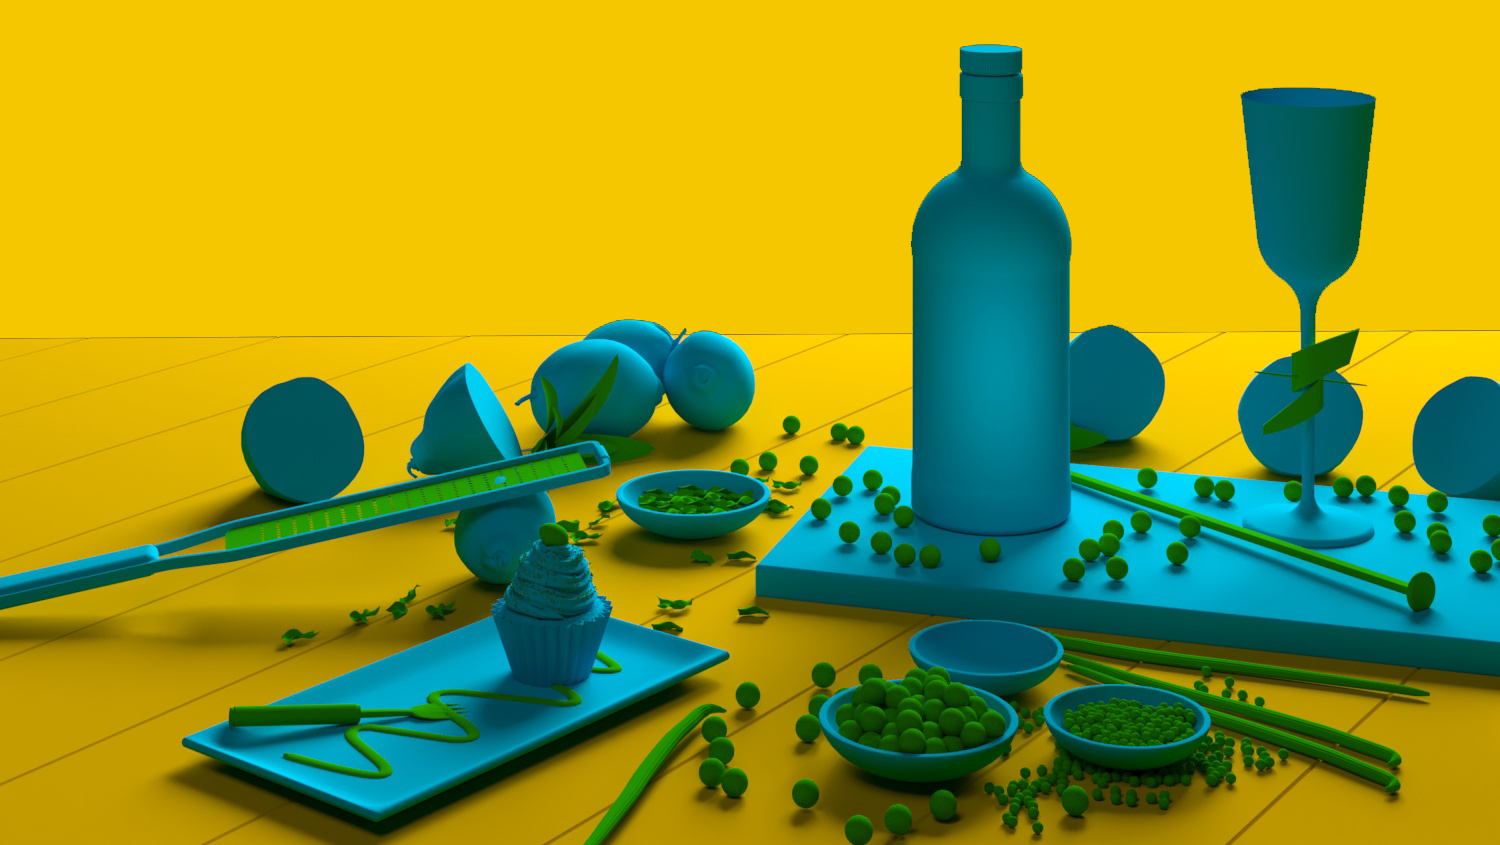
1 - Wide high angle still life/lifestyle (Landscape)
2 - High angle tighter crop on Gin Bottle (Portrait)
3 - Lower angle wider shot (Landscape)
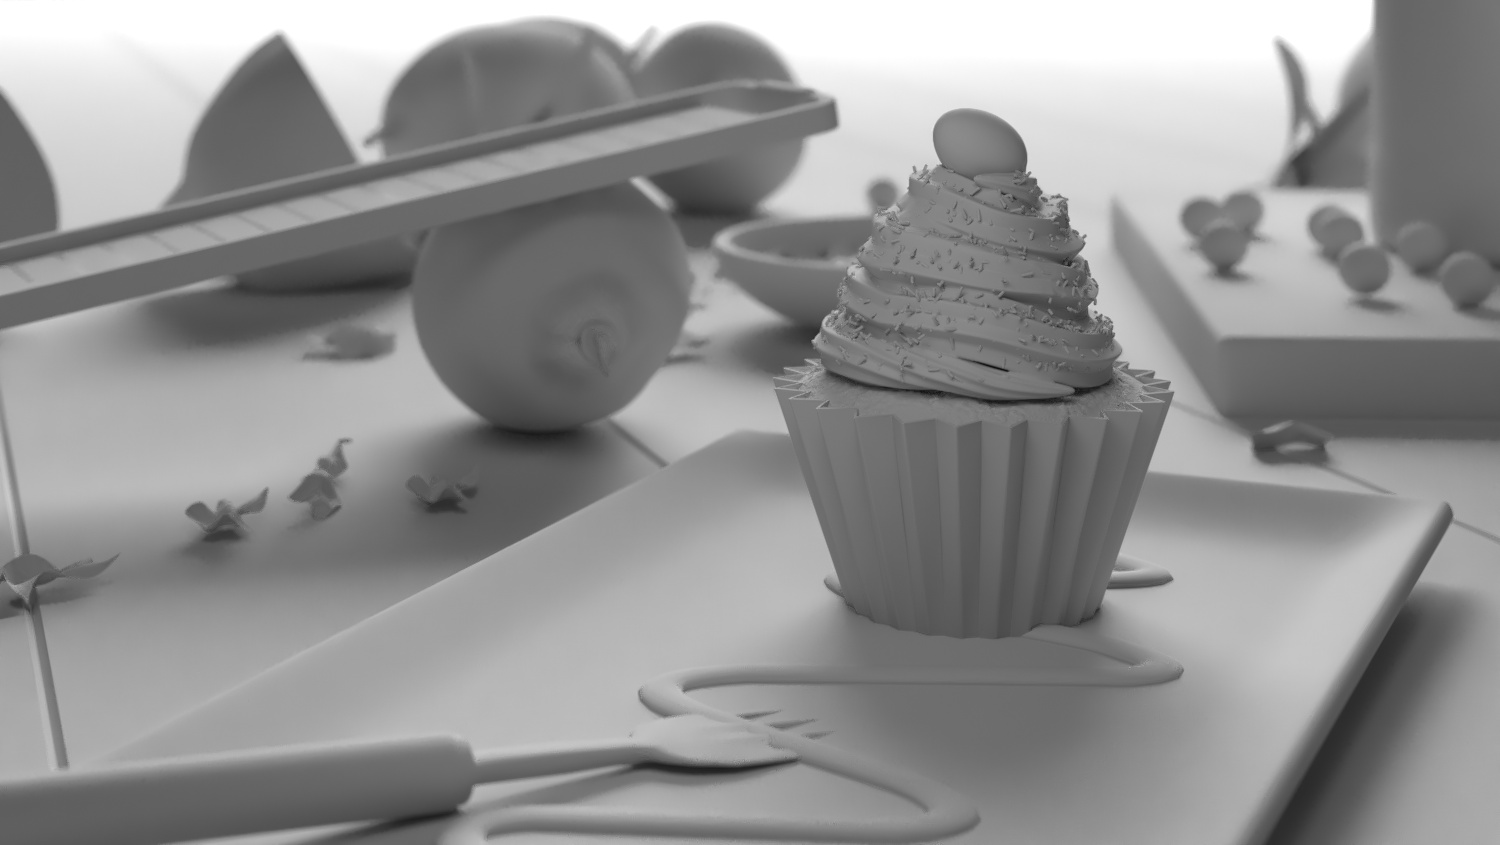
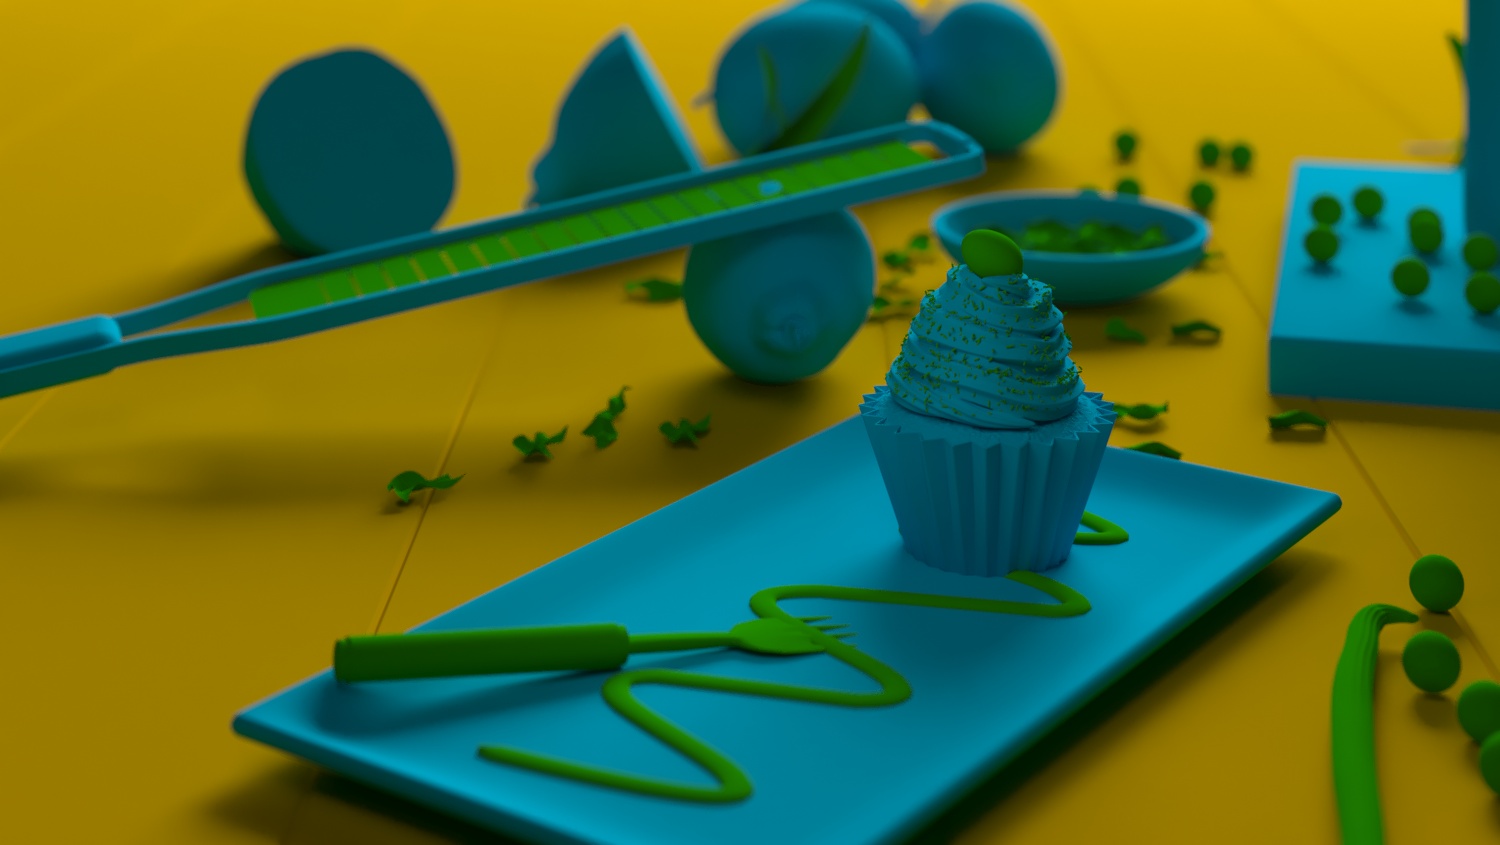
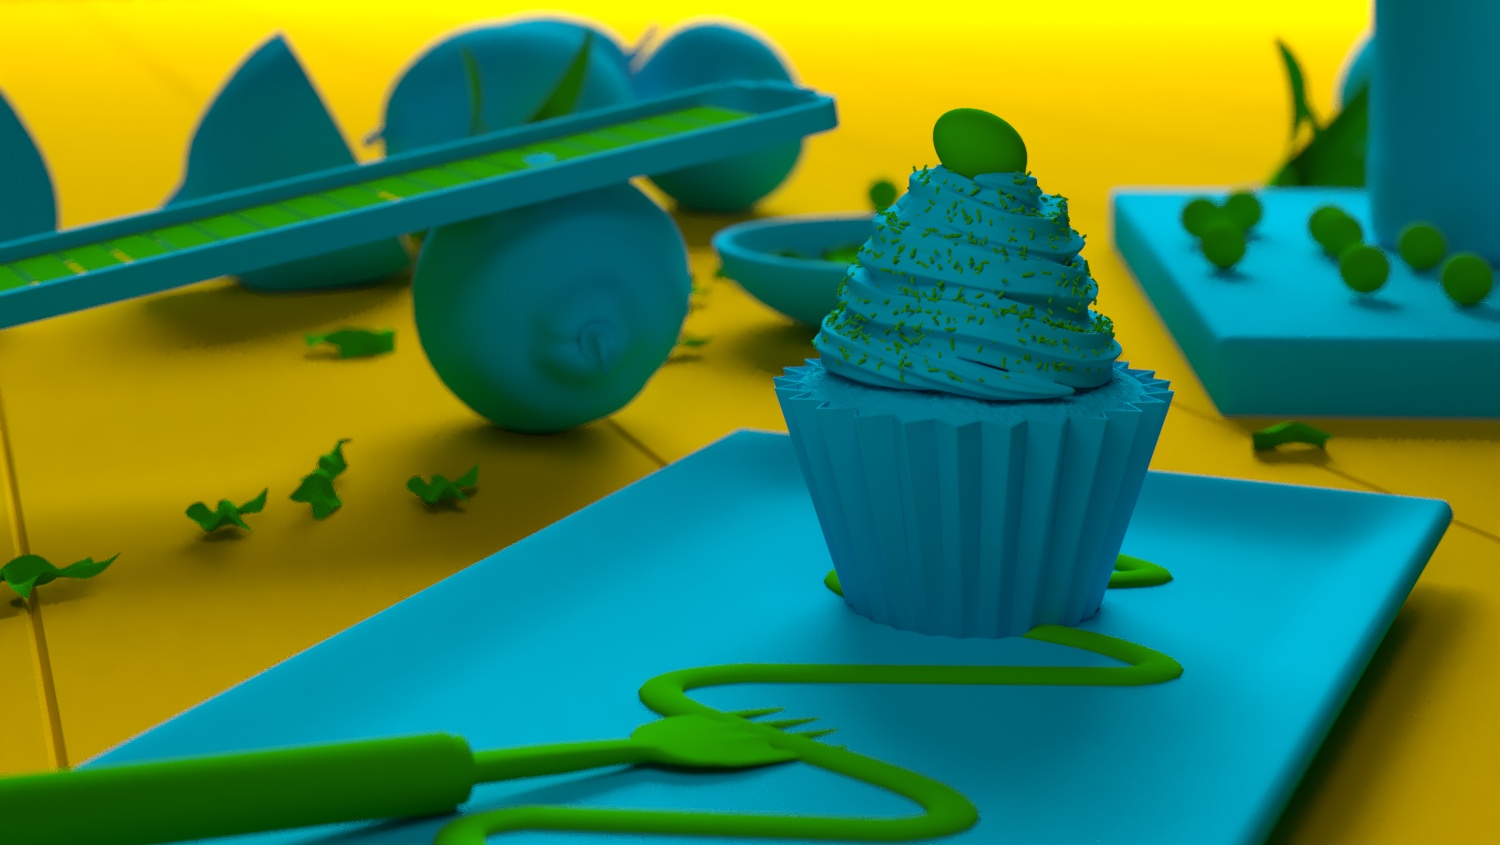
4 - Close up of lemon drizzle cake
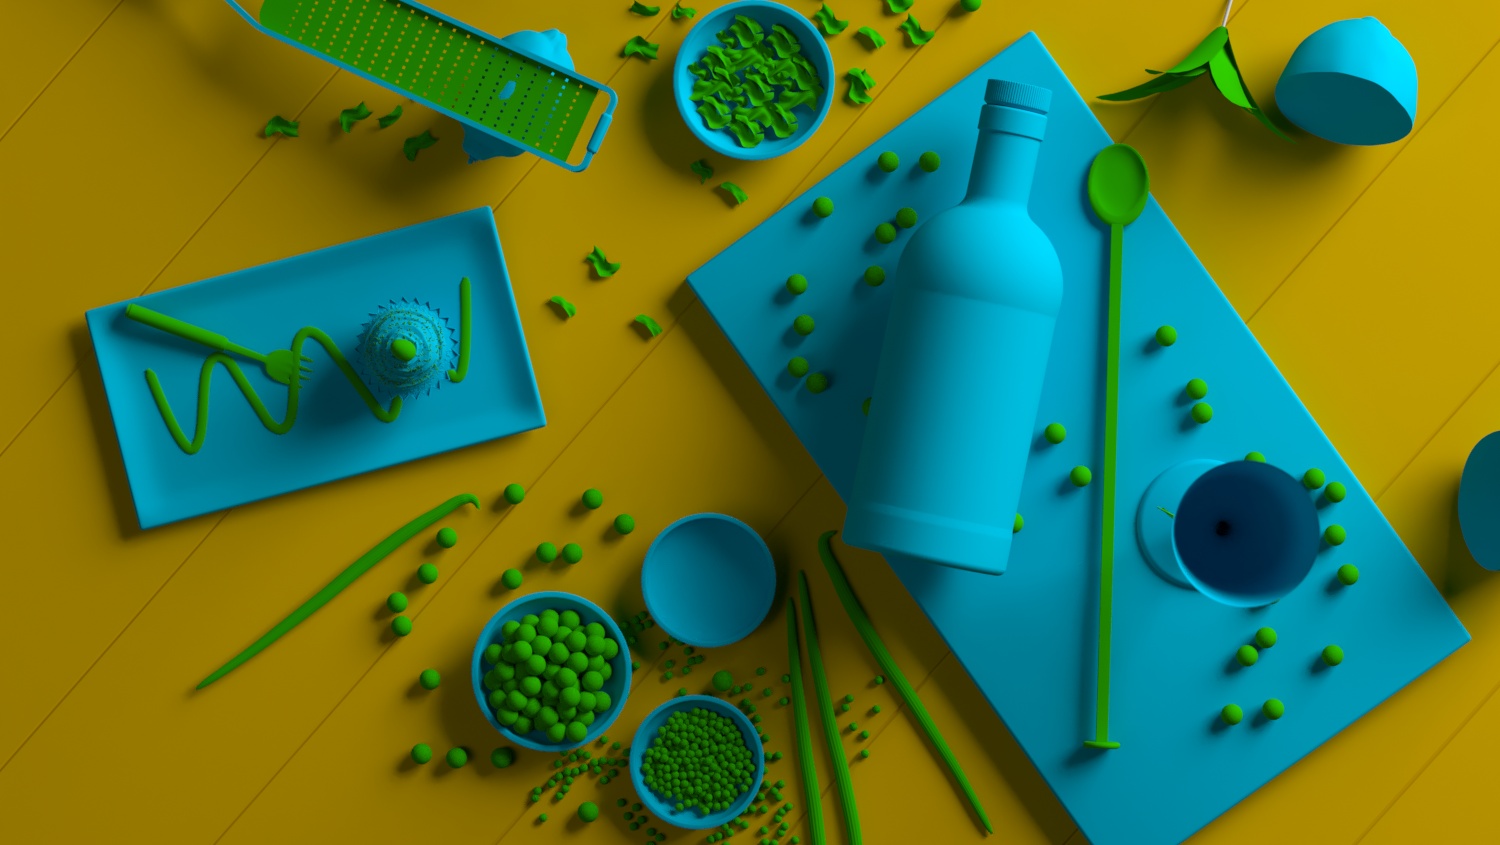
5 - Aerial shot of Scene
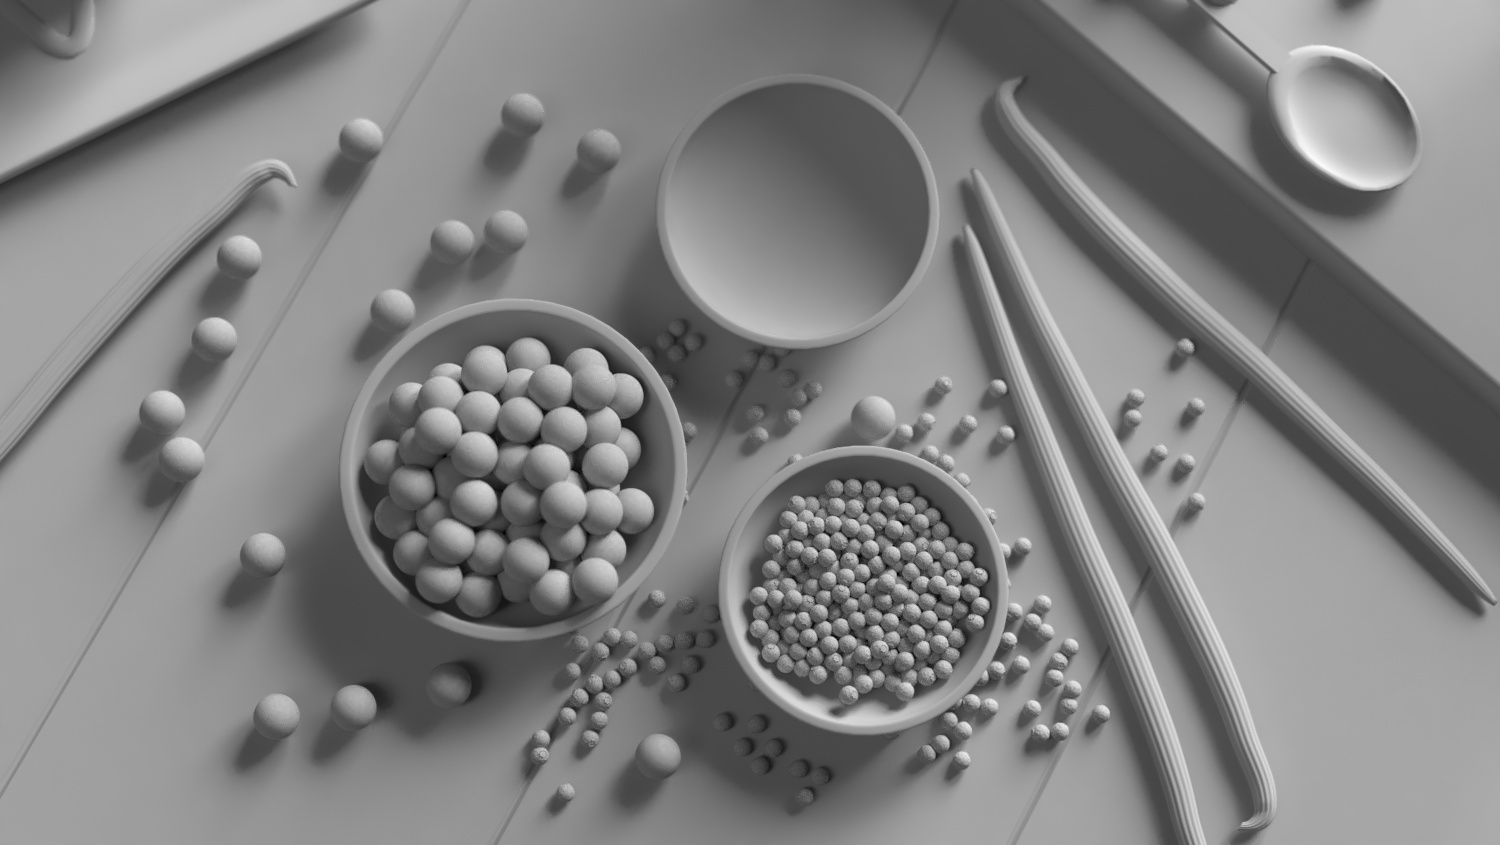
6 - Aerial close up of botanicals
Below you can see some clay renders of the mocked up scene. It might look like I have gone into a lot of detail with these but I worked quickly utilising existing assets or mocked up rough models. For some of the shots I produced a couple of different angles to help me try and decide which is more effective.
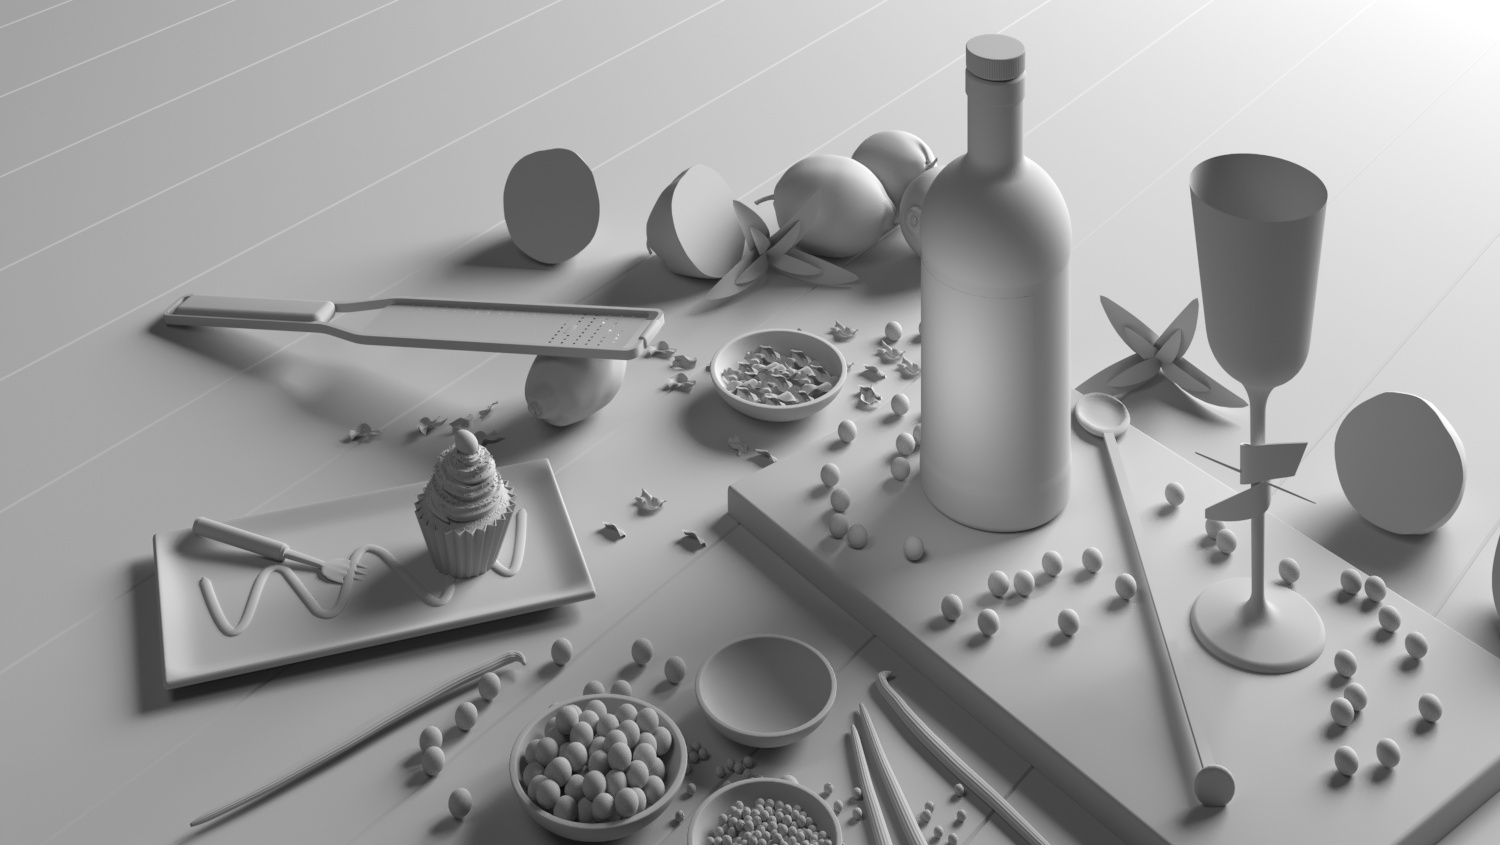
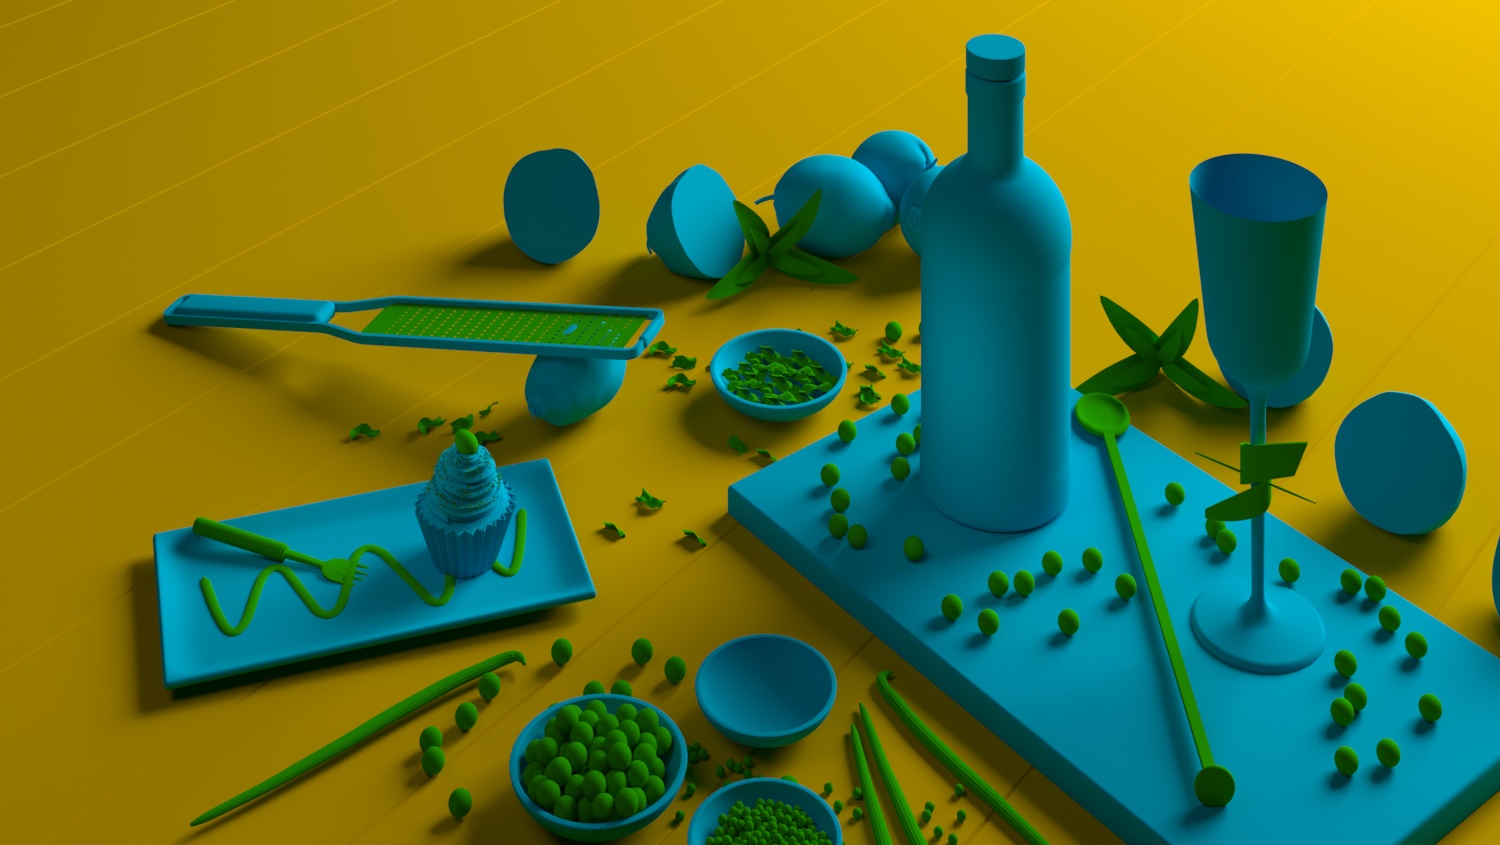
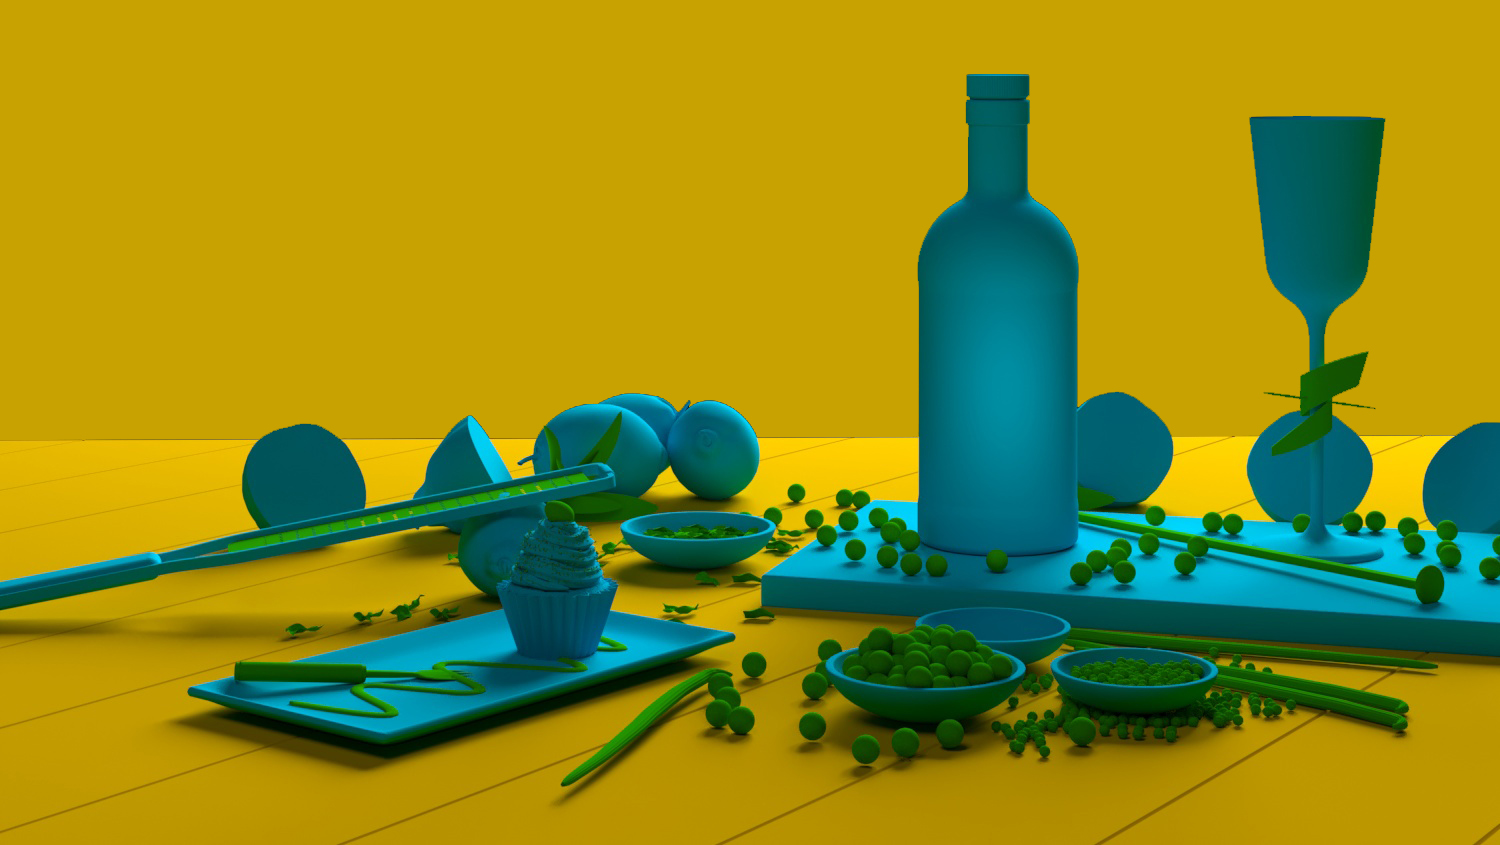
04: HIERACHY OF OBJECTS
While producing the mock ups of the scene I wanted to make sure I applied some principles I have been learning about recently, one of which was the idea of having a hierarchy between the size of objects within your scene to help make the scene feel more real. Below I have colour coded the objects according to there level in that hierarchy:
YELLOW - Primary Objects, the largest objects in the scene, in this case the ground plane and background.
BLUE - Secondary Objects, the medium size objects in the scene and in this case the main focus of the scene
TERTIARY - Small Objects or the details of the scene, worth noting here that some of the tertiary objects will be produced using textures so wont be visible in these mock ups.
I found this part of the process really useful and it definitely made me reflect on previous projects and how I had been lacking in this area.


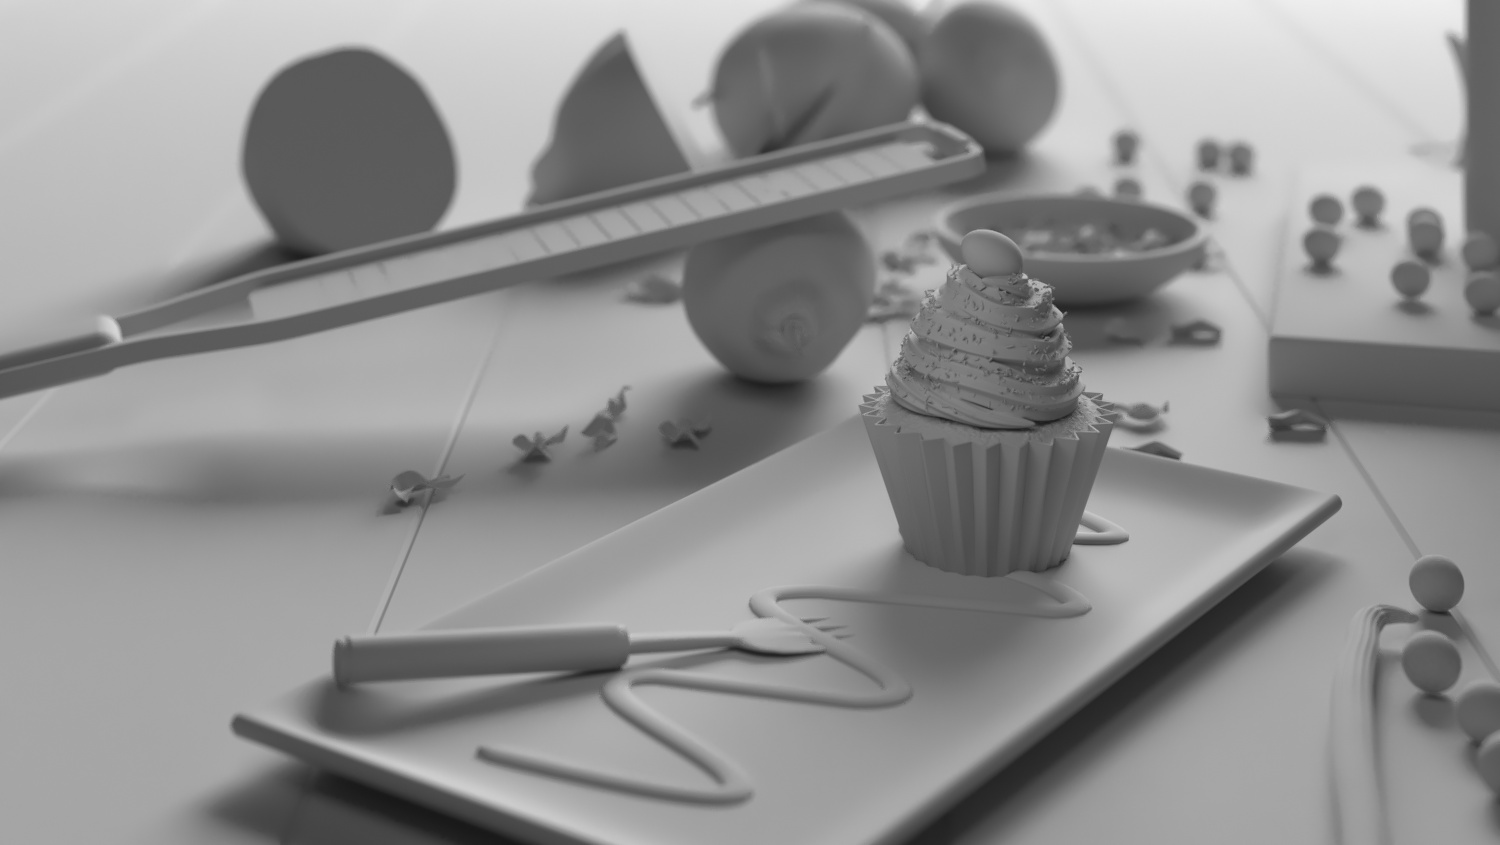
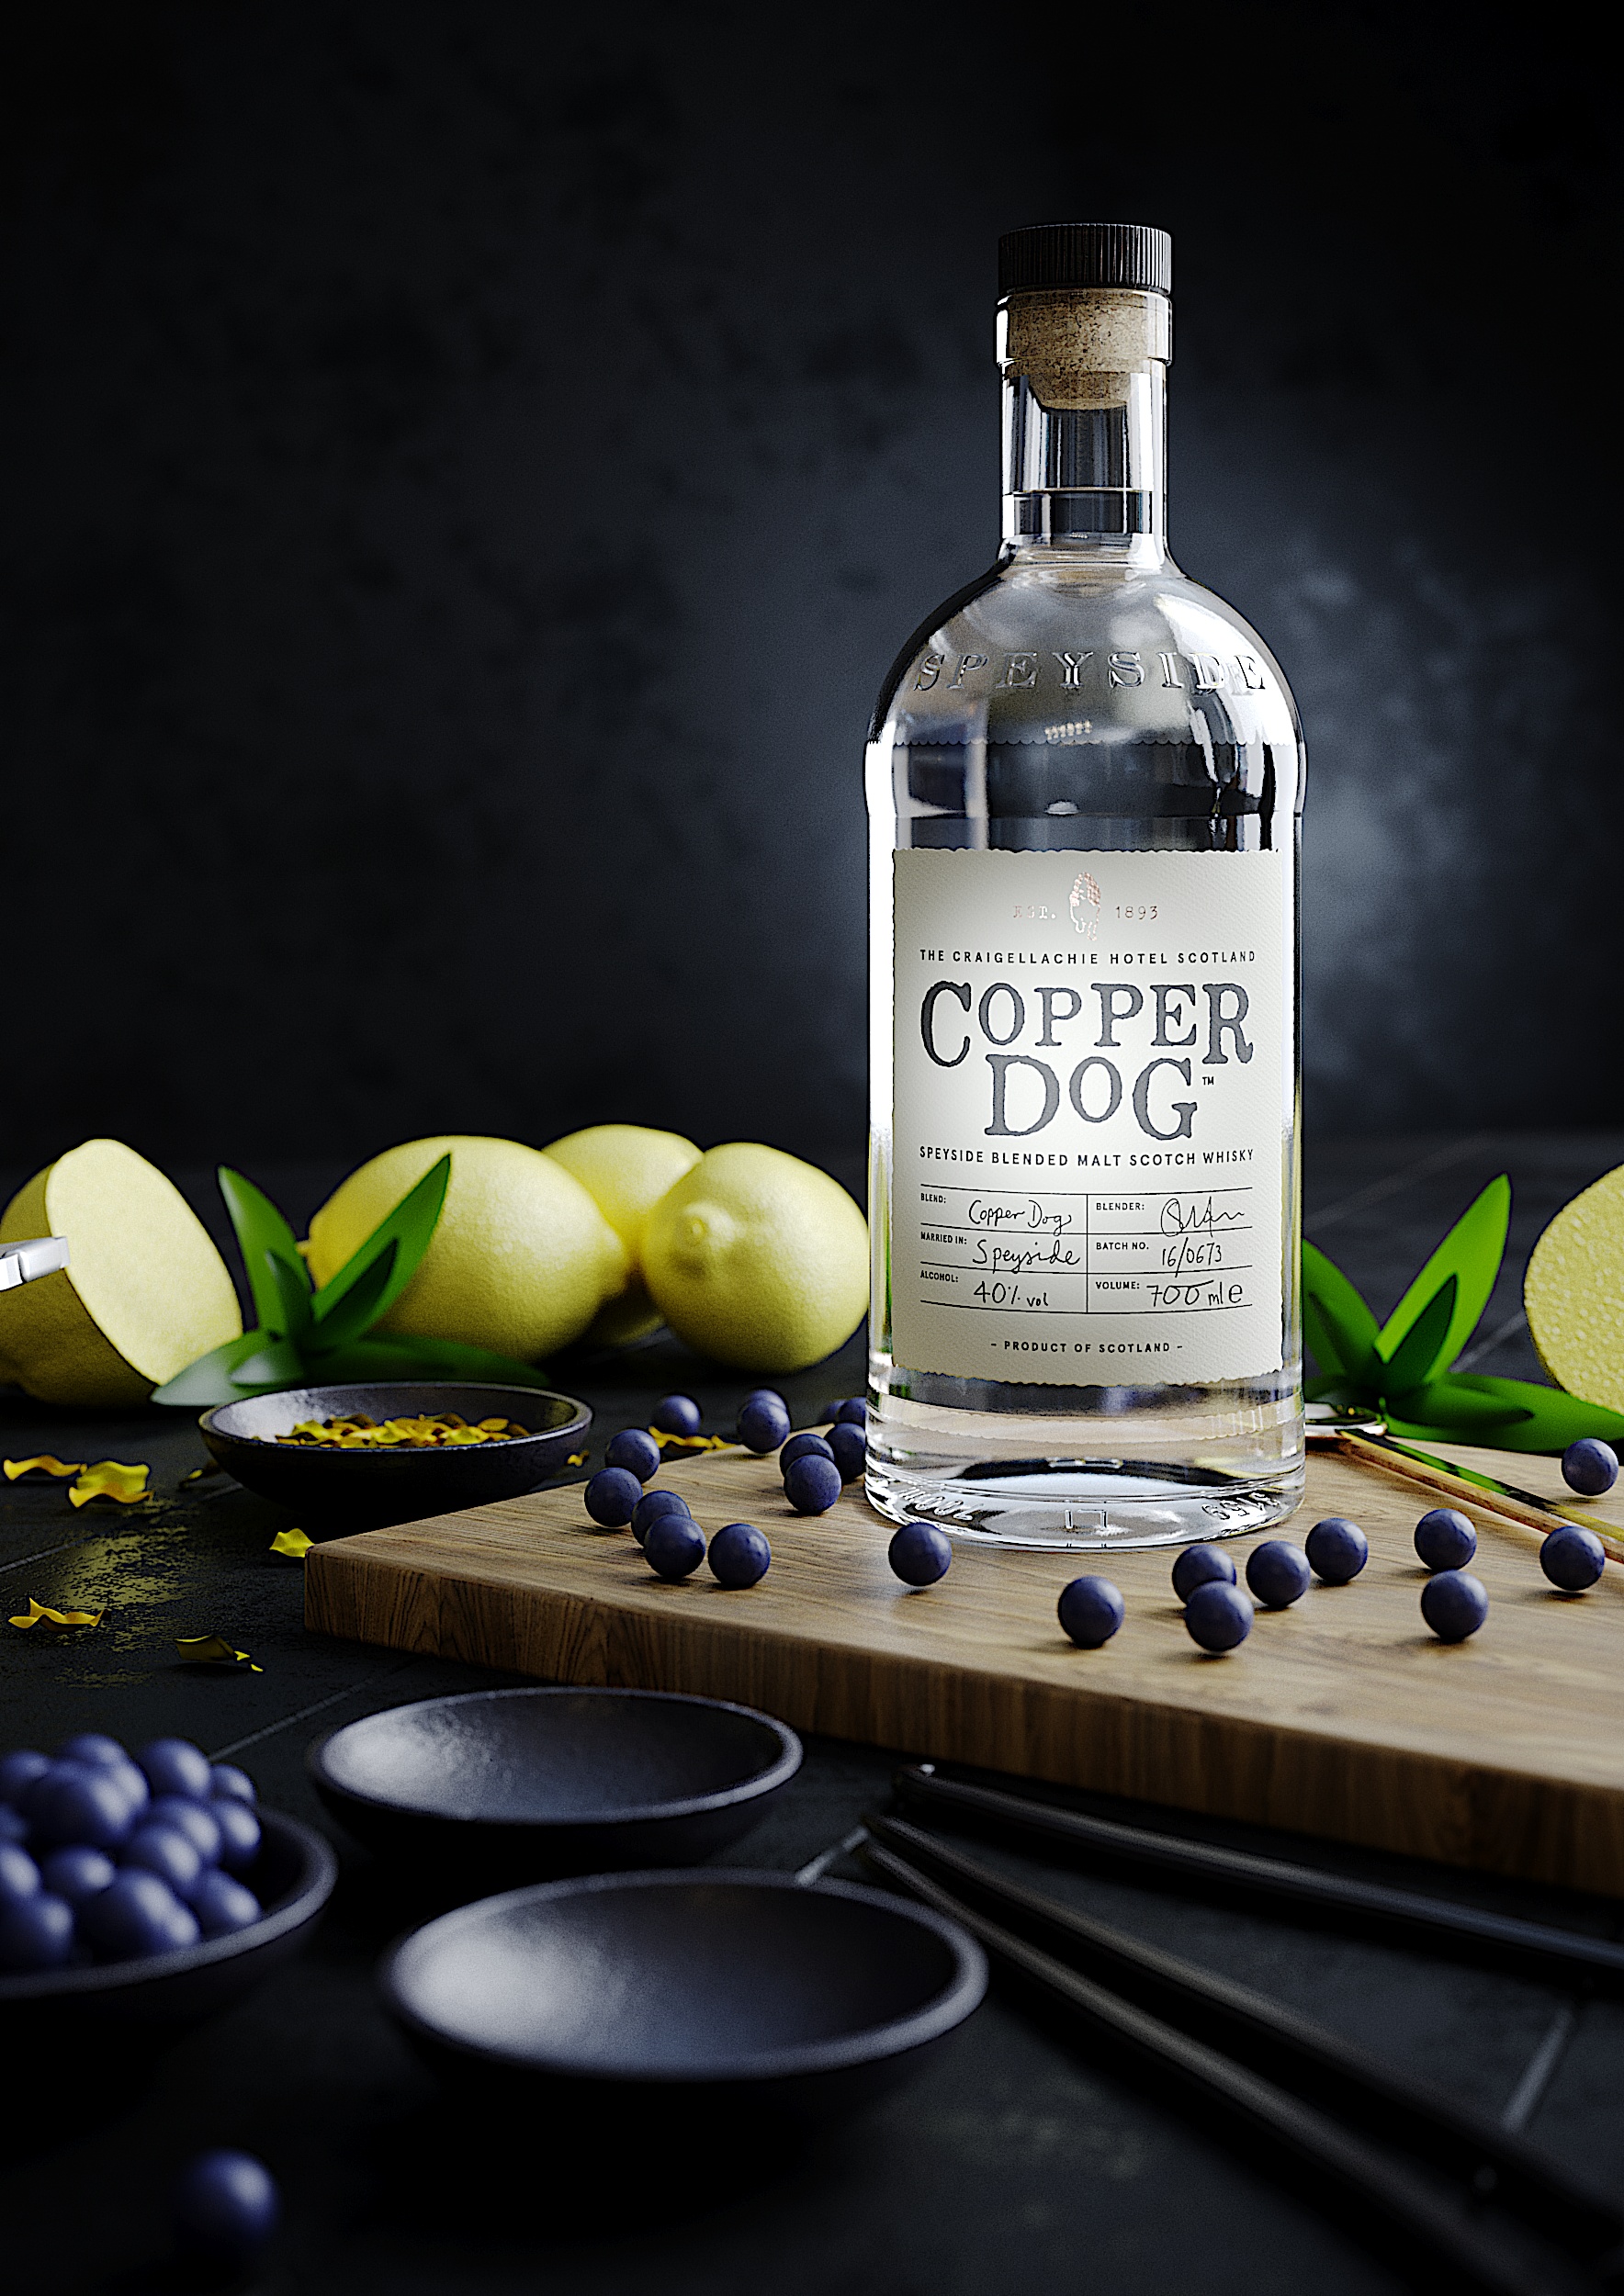
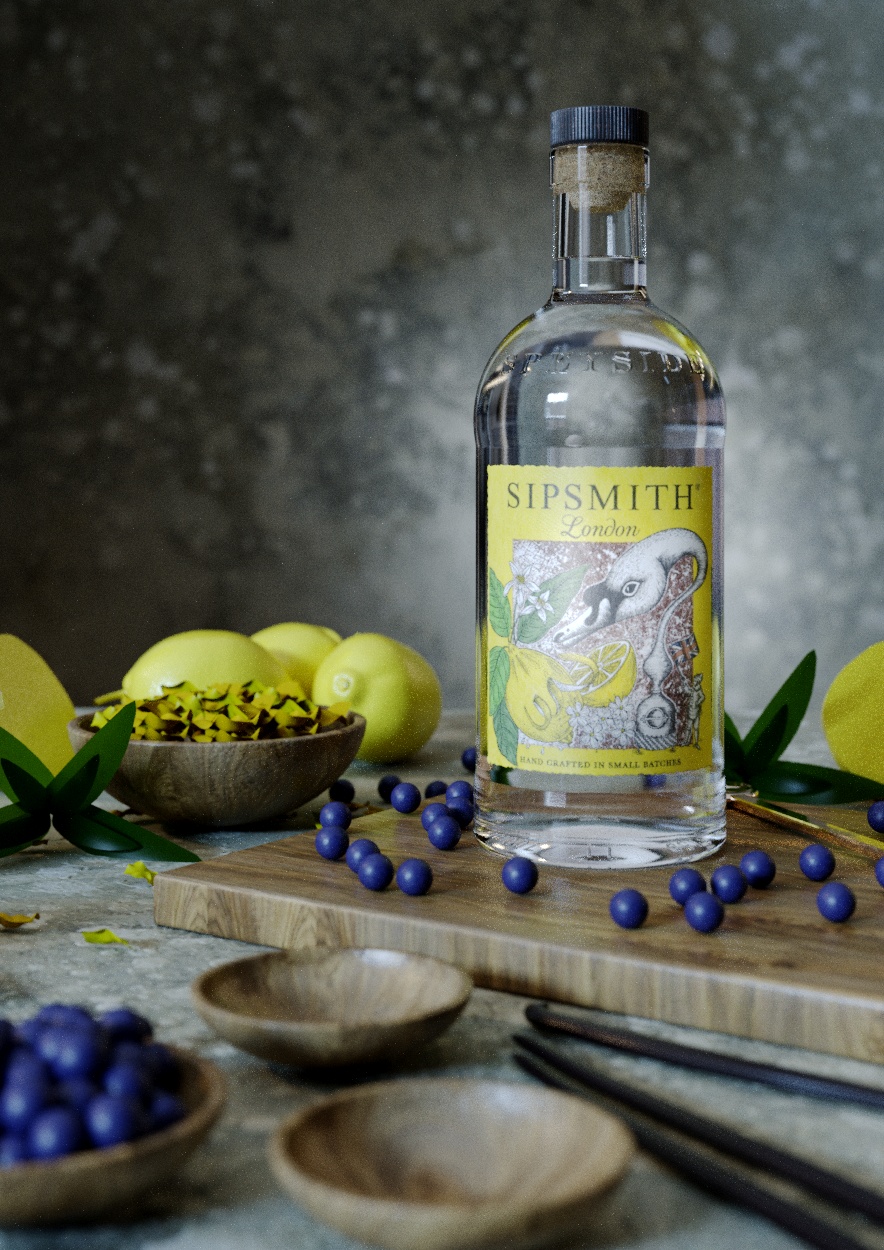
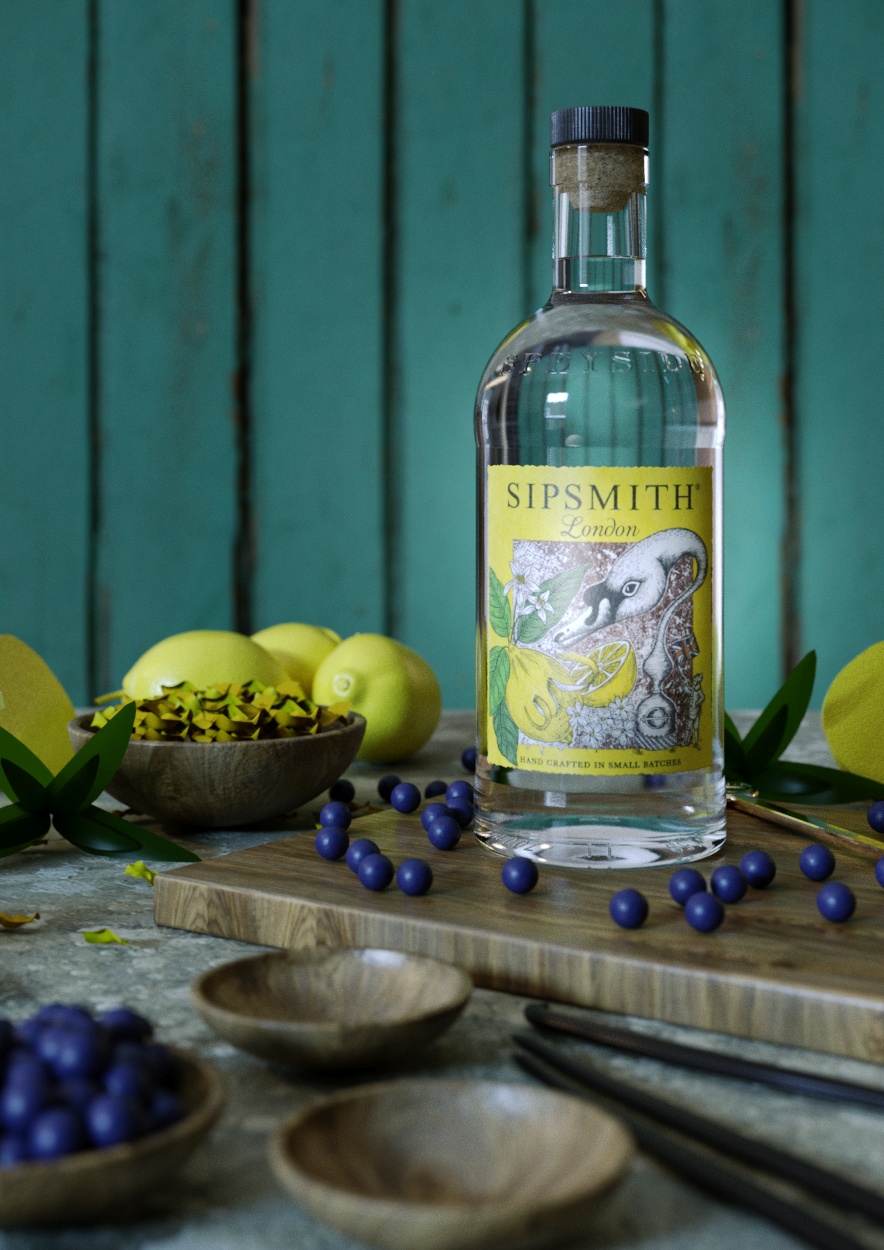
05: LOOK AND FEEL DEVELOPMENT
I based my initial look and feel development on the image below. My reason for this was that as soon as I started applying even rough materials and lighting this image began to come together really quickly, where as some of the other camera angles straight away looked terrible.
I very quickly applied some rough materials and lighting using a HDRI and some Corona lights and then played around until I had a few possible options. At this point i'm not sure which is my preference.

06: KEY LEARNINGS
Closer is Better & Make the 'Thing' the 'Thing'
I think this is especially relevant in 3D Visualisation because you put a allot of time and energy into modelling items that you want to try and include all of every item in every shot. The end result of this is that images lack focus, are to wide and angle and ultimately fail.
High Angle Tall Subjects
Because the Gin bottle which is the main subject of this project is tall and narrow, whenever the camera angle increases the overall impact of the the bottle is diminished, in a way it looses power and my image lost impact and a focal point. As soon as I lowered the camera angle the image started to work allot better.
Bad Camera Angle = Bad Images
I can't emphasize enough how important composition is to an image, you will never save a bad composition with amazing lighting and materials and more importantly you can waste so much time trying to make a poorly composed image work by labouring over the lighting and materials
In previous projects I have roughly modelling a scene, set up one camera and then laboured over the lighting and materials to a point of despair without realising it was my composition that sucked.
It is definitely better to set up rough lighting and the explore the scene by setting up a number of possible camera angles. Working in this way will probably save me hrs/weeks/months of lost time and despair.
Preconceived Ideas
I went into the previz stage of this process with a clear Idea of what I wanted. I had in my mind a composition for the image based on an example I had seen, unfortunately the example I was basing the entire project on was a completely different shape, It is short and wide and so worked when shooting from a higher angle. My subject didn't and I spent time trying to make this shot work when ultimately it was doomed to fail.
Work Fast and Work Loose
What I realised during this process is that the mock up stage is fast and its fun, that's kind of the point. I can make decisions much quicker, see what works and what doesn't, try out ideas without investing to much energy in them.
I found myself a few times spending to much time mocking up a specific element when it absolutely did not require it. This is an area in which i need to improve my discipline.
Really this whole stage of the process is about trying out ideas as quickly as possible to discount them or prove that they work so you can develop them over the preceding stages of the process.